Introducción al sensor de temperatura Dallas one wire usando un PLC Arduino
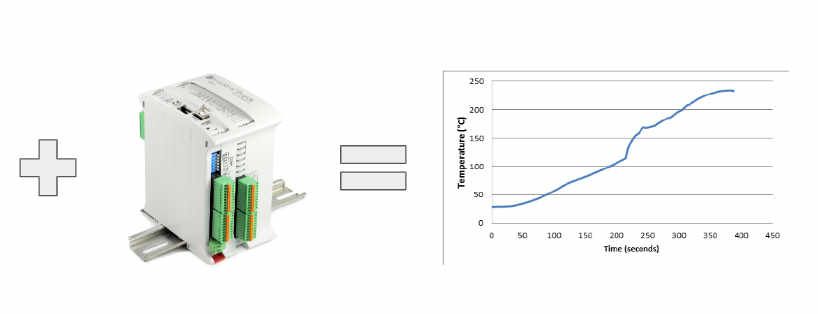
En este post se mostrará cómo leer un valor de temperatura utilizando un sensor de temperatura DS18B20, utilizando el protocolo OneWire.Esta es una manera sencilla de conocer la temperatura proporcionada por un sensor de temperatura.Lo bueno de este sensor es que ya proporciona una biblioteca Arduino, lo que ayuda en su programación.
Requisitos para la instalación de monitorización
Ethernet PLC >>>
20 I/Os PLC >>>
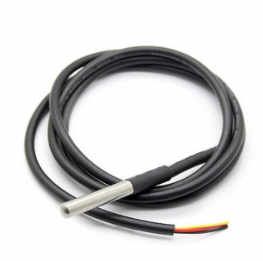
Dallas DS18B20 Sensor >>>
Dallas DS18XX Arduino library
Github repository >>>
Placas de Industrial Shields:
Cómo utilizar los pines de mapeo de las placas Industrial shields
Leer el post >>>
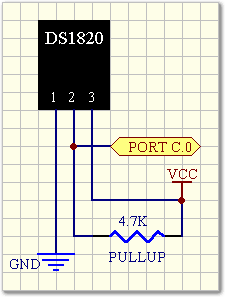
Conexión del sensor Dallas one wire al PLC Arduino

Software para programar el PLC Arduino
Lista de dispositivos conectados
El sketch enumera los dispositivos conectados al pin OneWire y muestra su dirección.También muestra una nota cuando el dispositivo no es un dispositivo DS18xx compatible con la biblioteca.
#include <OneWire.h>
#include <DallasTemperature.h>

#define ADDR_LEN 8
#define PIN 2

OneWire oneWire(PIN);
DallasTemperature sensors(&oneWire);

////////////////////////////////////////////////////////////////////////////////////////////////////
void setup() {
  Serial.begin(9600L);
  Serial.println("ds18xx-list-devices started");
}

////////////////////////////////////////////////////////////////////////////////////////////////////
void loop() {
  Serial.println("----------------------------------------------------");

sensors.begin();

int deviceCount = sensors.getDeviceCount();
  Serial.print("Devices: ");
  Serial.println(deviceCount);

int ds18Count = sensors.getDS18Count();
  Serial.print("DS18xx devices: ");
  Serial.println(ds18Count);

uint8_t address[ADDR_LEN];
  for (int i = 0; i < deviceCount; ++i) {
    if (sensors.getAddress(address, i)) {
      Serial.print("Address: ");
      printAddress(address);
    }
  }
  delay(5000);
}

////////////////////////////////////////////////////////////////////////////////////////////////////
void printAddress(const uint8_t *address) {
  for (int i = 0; i < ADDR_LEN; ++i) {
    if (i > 0) {
      Serial.print('-');
    }
    if (address[i] < 0x10) {
      Serial.print('0');
    }
    Serial.print(address[i], HEX);
  }
  if (!sensors.validFamily(address)) {
    Serial.print(" (not supported)");
  }
  Serial.println();
}
Controlar el calentador en función de las lecturas de temperatura
El sketch obtiene el sensor de temperatura utilizando la biblioteca y luego lee periódicamente su temperatura.Cuando la temperatura es más fría que el punto de ajuste de temperatura, activa la salida Q0.0 para encender el calentador.
#include <DallasTemperature.h>
#define TEMP_SET_POINT 25      // Celsius
#define TEMP_READ_PERIOD 1000  // ms
#define TEMP_RESOLUTION 12     // bits
#define ONEWIRE_PIN 2          // Pin for the OneWire
#define HEATER_PIN Q0_0        // Digital Output pin to ON the heater

Not configurable constants
#define INVALID_SENSOR_INDEX 0xff
#define INVALID_TEMP 0x7fff
#define ADDRESS_LEN 8 // bytes

OneWire oneWire(ONEWIRE_PIN);
DallasTemperature sensors(&oneWire);
uint8_t tempIndex = INVALID_SENSOR_INDEX;
double temp = INVALID_TEMP;

////////////////////////////////////////////////////////////////////////////////////////////////////

void setup() {
  Serial.begin(9600L);
  Serial.println("ds18xx-temp-control started");
  initTempSensor();
}
////////////////////////////////////////////////////////////////////////////////////////////////////

void loop() {
  updateTemp();
  updateHeater();
}

////////////////////////////////////////////////////////////////////////////////////////////////////

void printAddress(const uint8_t *address) {
  for (uint8_t i = 0; i < ADDRESS_LEN; ++i) {
    if (i > 0) {
      Serial.print('-');
    }
    if (address[i] < 0x10) {
      Serial.print('0');
    }
    Serial.print(address[i], HEX);
  }
}

////////////////////////////////////////////////////////////////////////////////////////////////////

void initTempSensor() {
  // Begin sensors library
  sensors.begin();
  // Get temperature sensor
  uint8_t address[ADDRESS_LEN];
  uint8_t numDevices = sensors.getDeviceCount();   //number of devices connected
  for (uint8_t i = 0; i < numDevices; ++i) {       //loop for check all the devices connected
    if (sensors.getAddress(address, i)) {          //verification of correct address
      if (sensors.validFamily(address)) {          //verification of valid family
        tempIndex = i;                             //tempIndex different from INVALID_SENSOR_INDEX, flag
        Serial.print("Sensor address: ");
        printAddress(address);
        Serial.print(" (");
        Serial.print(tempIndex);
        Serial.print(")");
        Serial.println();
        break;
      }
    }
  }
  // Set sensors parameters
  sensors.setResolution(TEMP_RESOLUTION);        //This temperature resolution is of 12bits
}

////////////////////////////////////////////////////////////////////////////////////////////////////

void updateTemp() {
  static uint32_t lastUpdate = millis();
  if (tempIndex == INVALID_SENSOR_INDEX) {      //If the sensor index is invalid, we initialize the temperature sensor again.
    initTempSensor();
  }
  else {                                       //If it is correct, we read the actual temperature from the sensor
    if (millis() - lastUpdate > TEMP_READ_PERIOD) {
      if (sensors.requestTemperaturesByIndex(tempIndex)) {
        temp = sensors.getTempCByIndex(tempIndex);
      }
    }
  }
}

////////////////////////////////////////////////////////////////////////////////////////////////////
void updateHeater() {                         //Function that controls the heater, it compares the temperature with the set point in order to activate or not the digital output.
  static double lastTemp = INVALID_TEMP;
  if (lastTemp != temp) {
    digitalWrite(HEATER_PIN, temp < TEMP_SET_POINT ? HIGH : LOW);
    lastTemp = temp;
  }
}

